THE TROUBLEMAKER MANIFESTO: A DESIGN COLLOQUIUM - COLLATERAL (1 WEEK DURATION)
After finalizing the key artwork and title, I moved on to designing the poster by adding in the details of the event.
Here is the information on the event details provided by my Advanced Typography Facebook group:
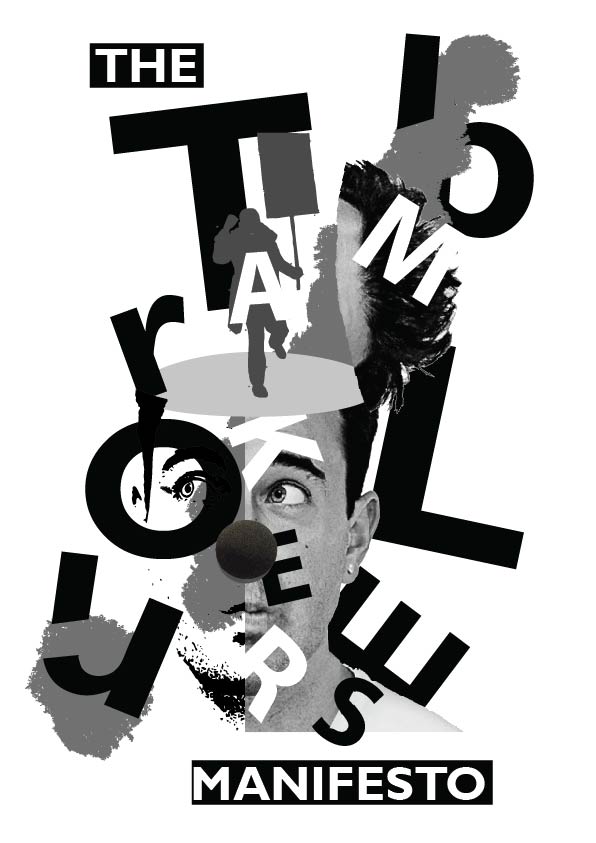
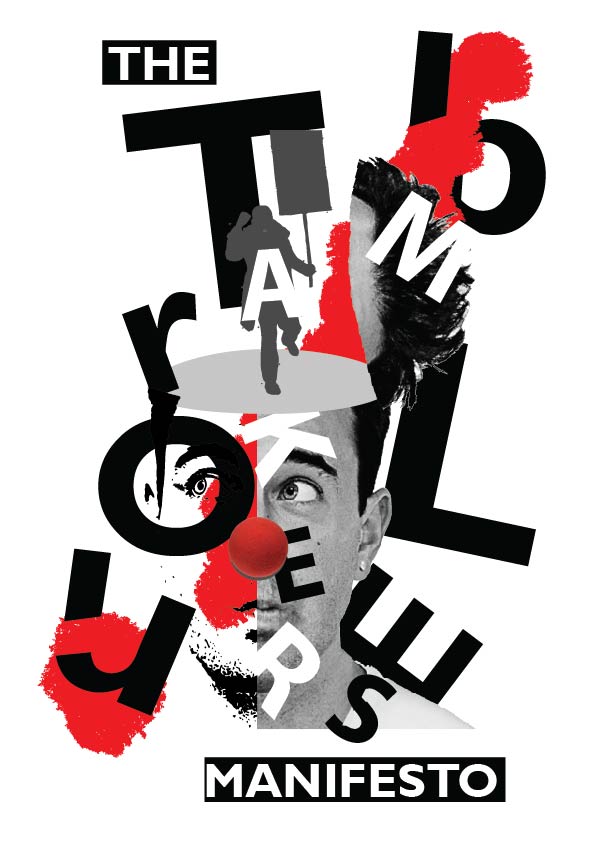
Here is the key artwork & title that I made in project 1 and I will be used it for each of my collateral.
Click on the blog link below to read about the key artwork I have designed:
https://andreaviechoong.com/advanced-typography-project-1/
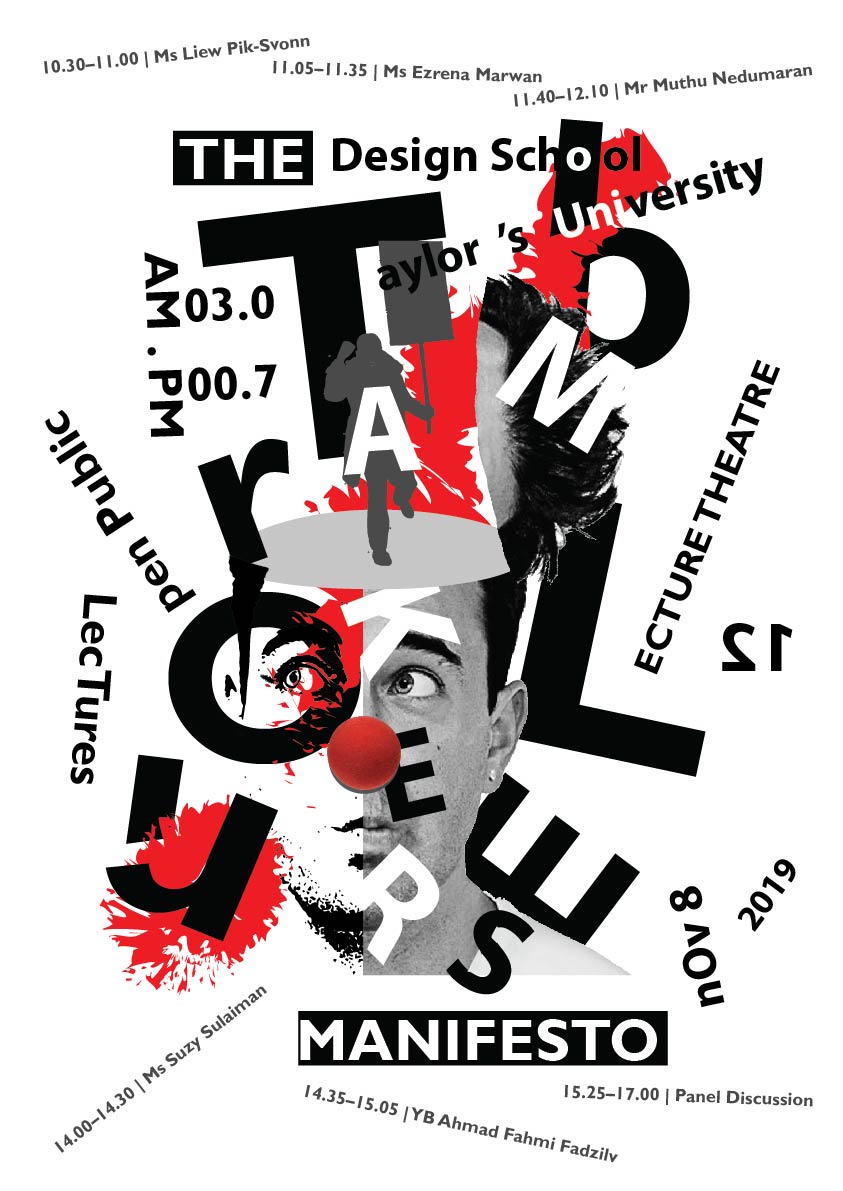
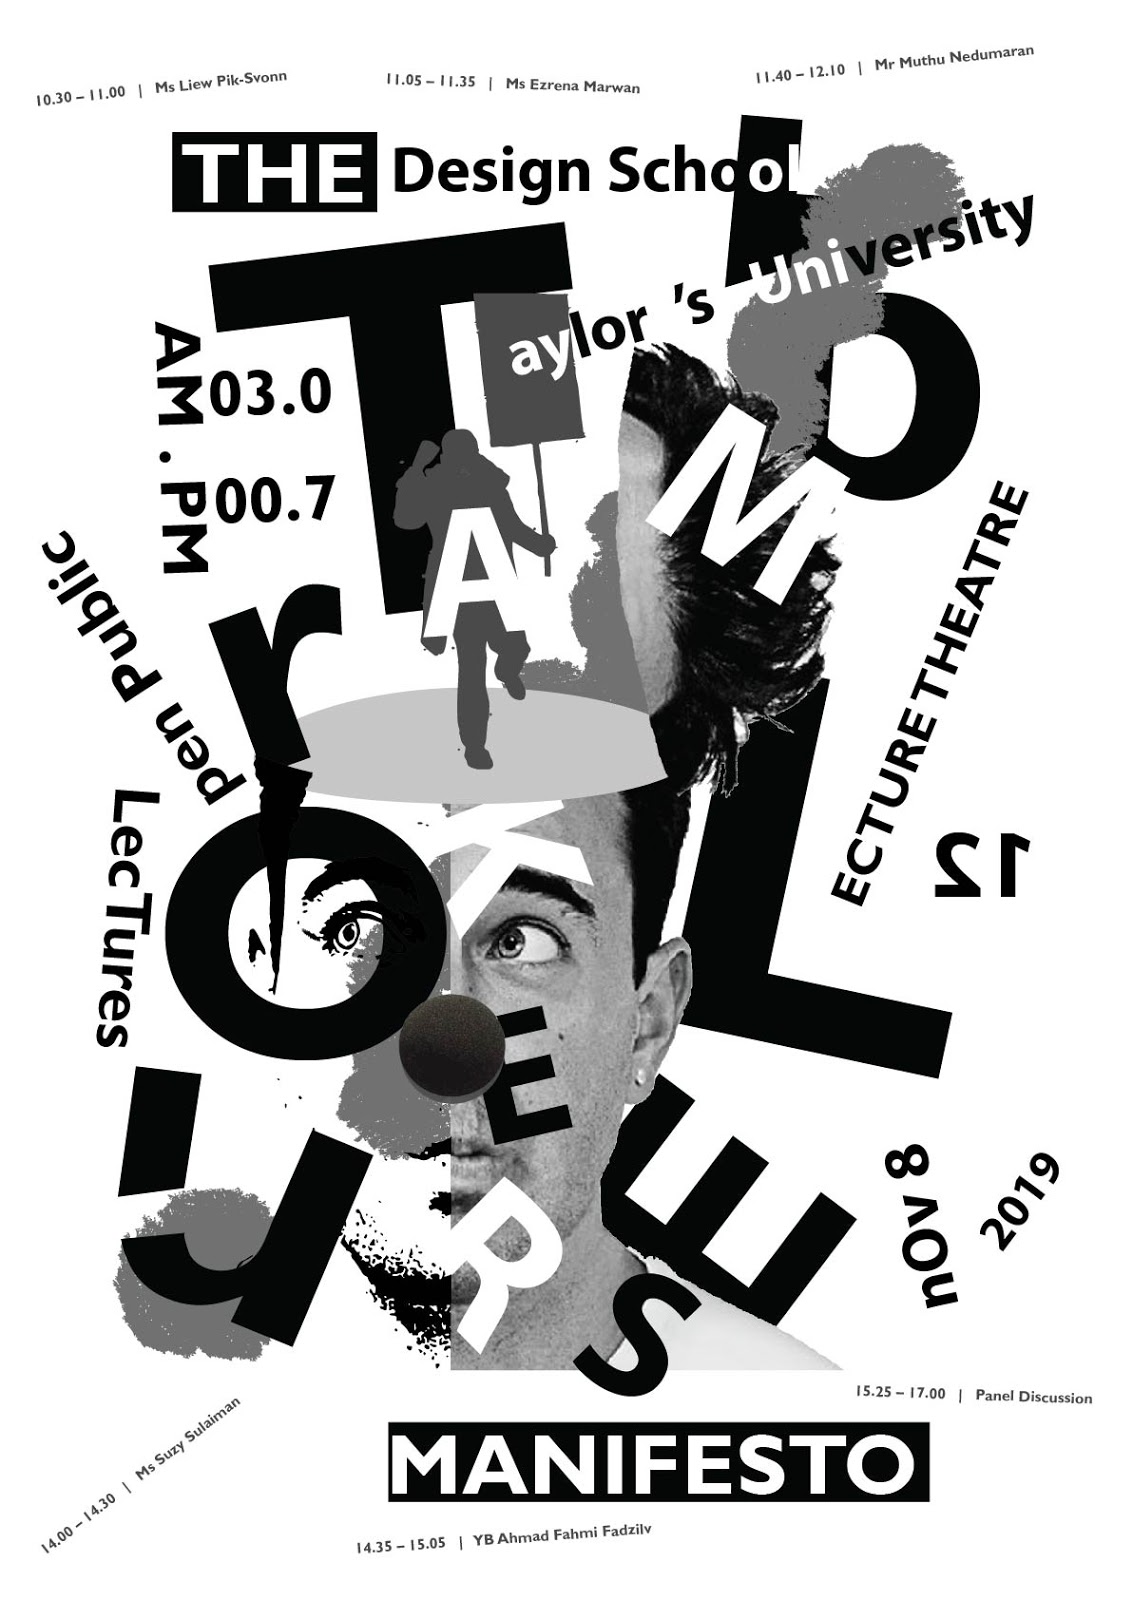
Final Outcome- Key Artwork & Title (Black & White)
Final Outcome- Key Artwork & Title (Coloured)
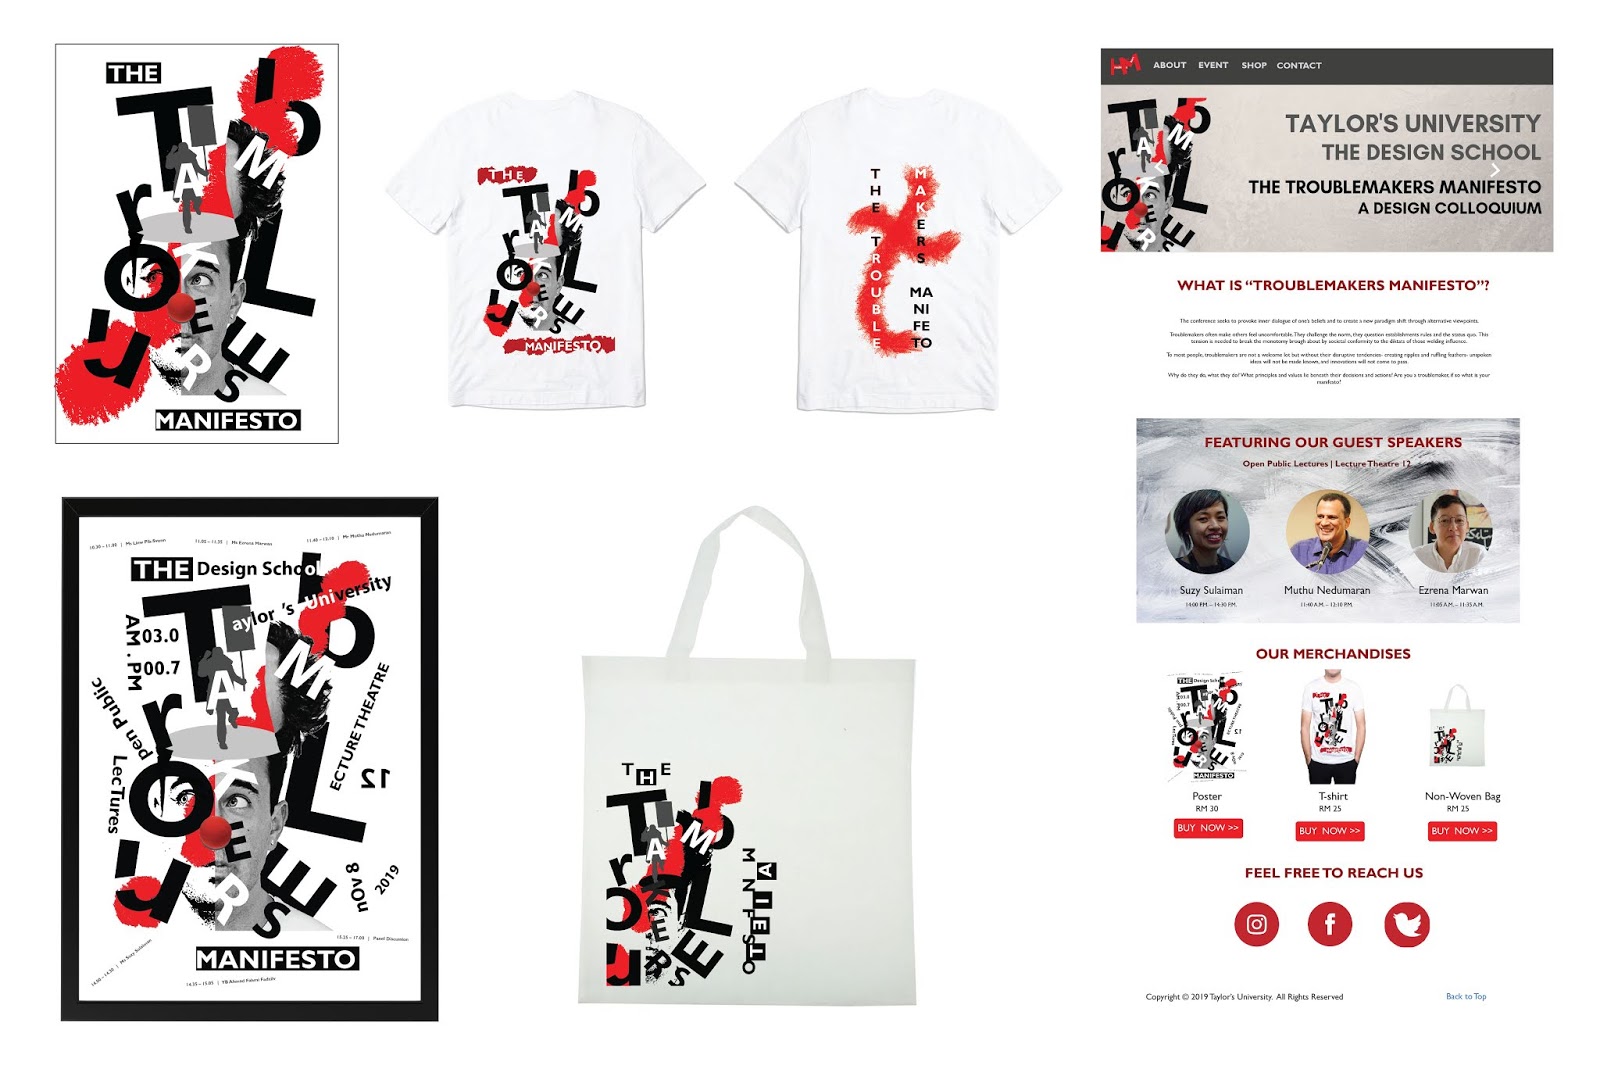
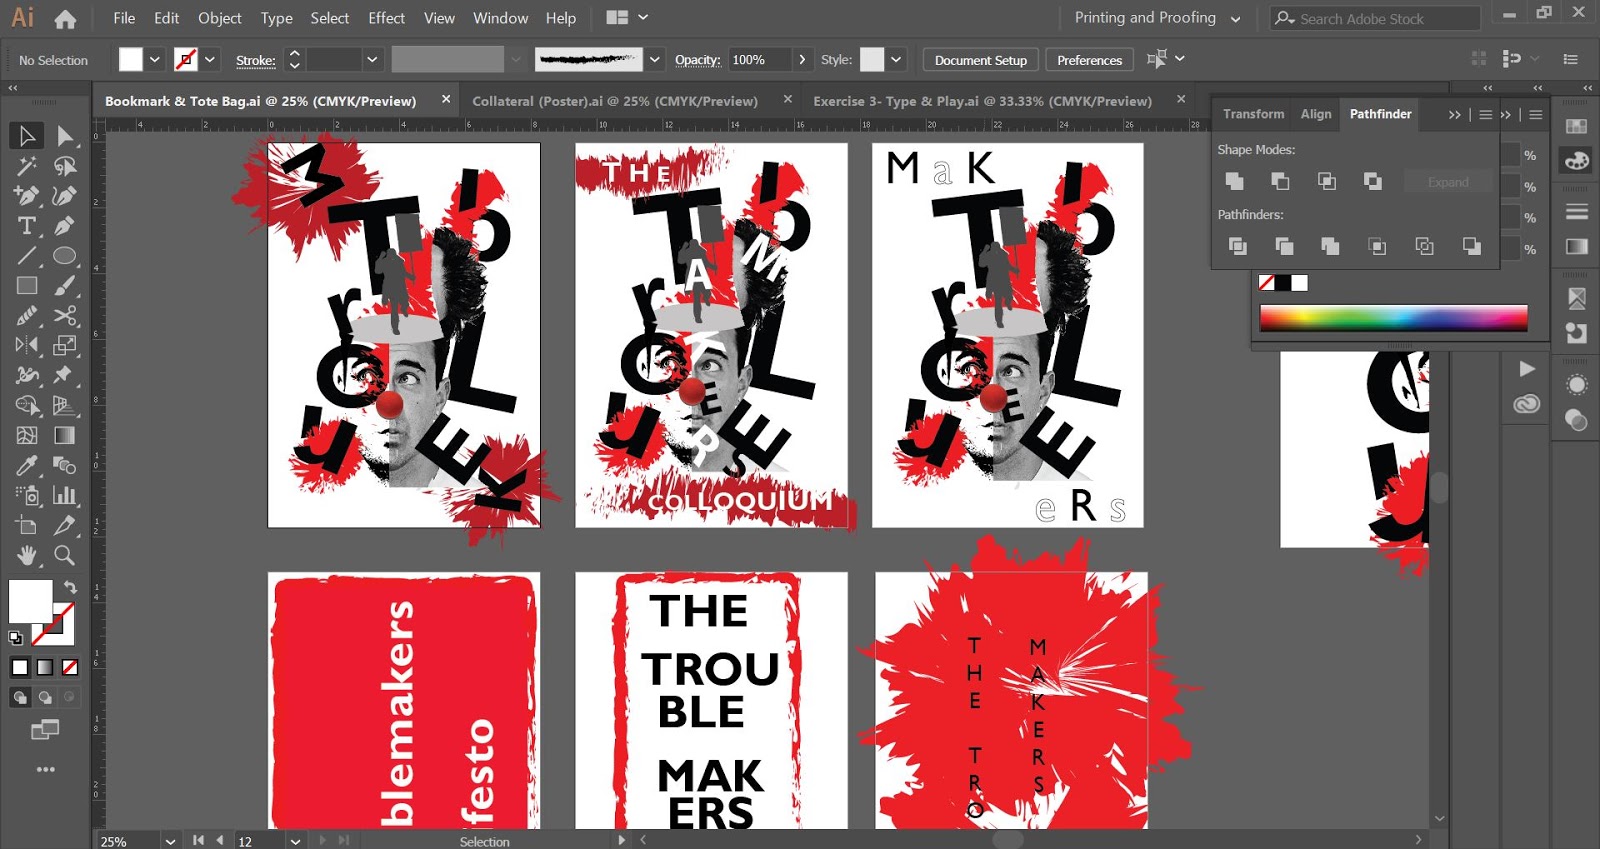
COLLATERAL: POSTER #1
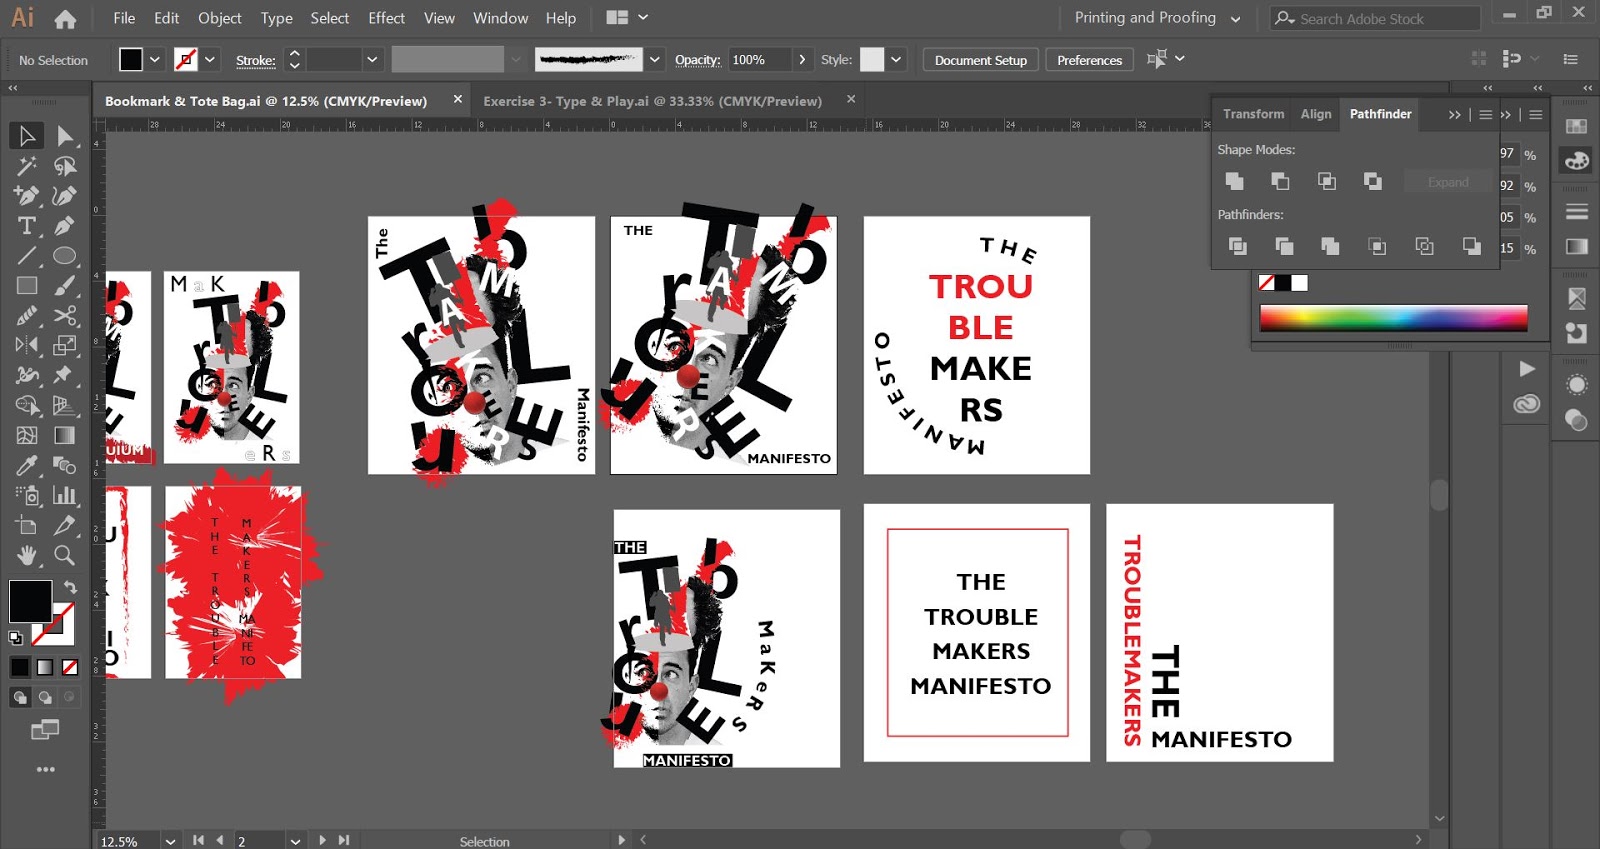
I explored different kinds of layout for the event details by using some of the typographic systems that I previously learned in exercise 1. It helps as a guideline and starting point for my layout design of the poster.
Progress of poster design in Adobe Illustrator
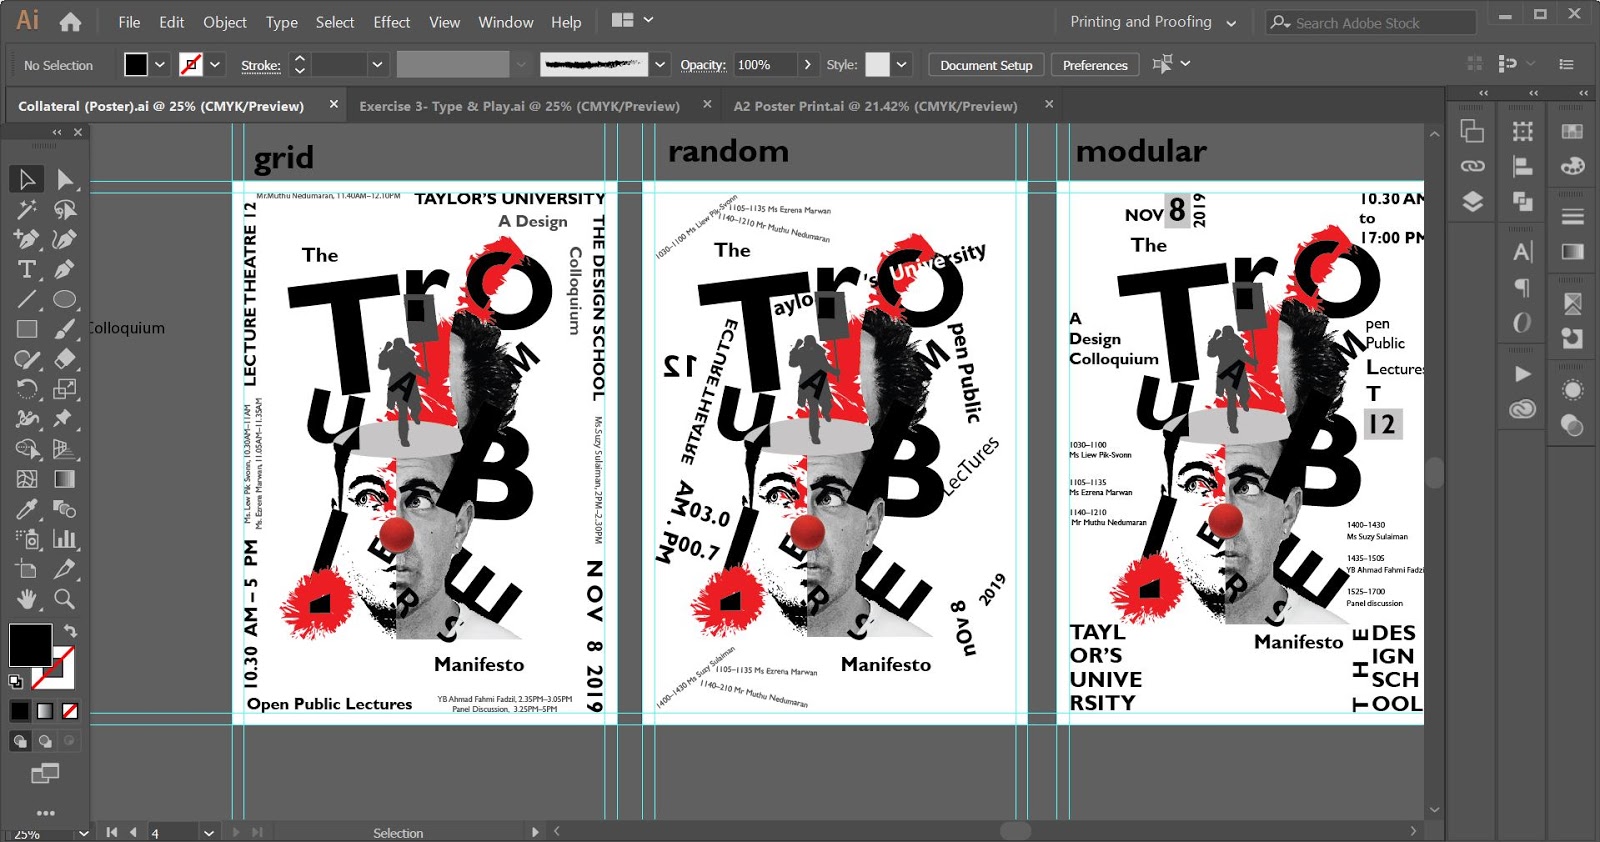
Composition #1
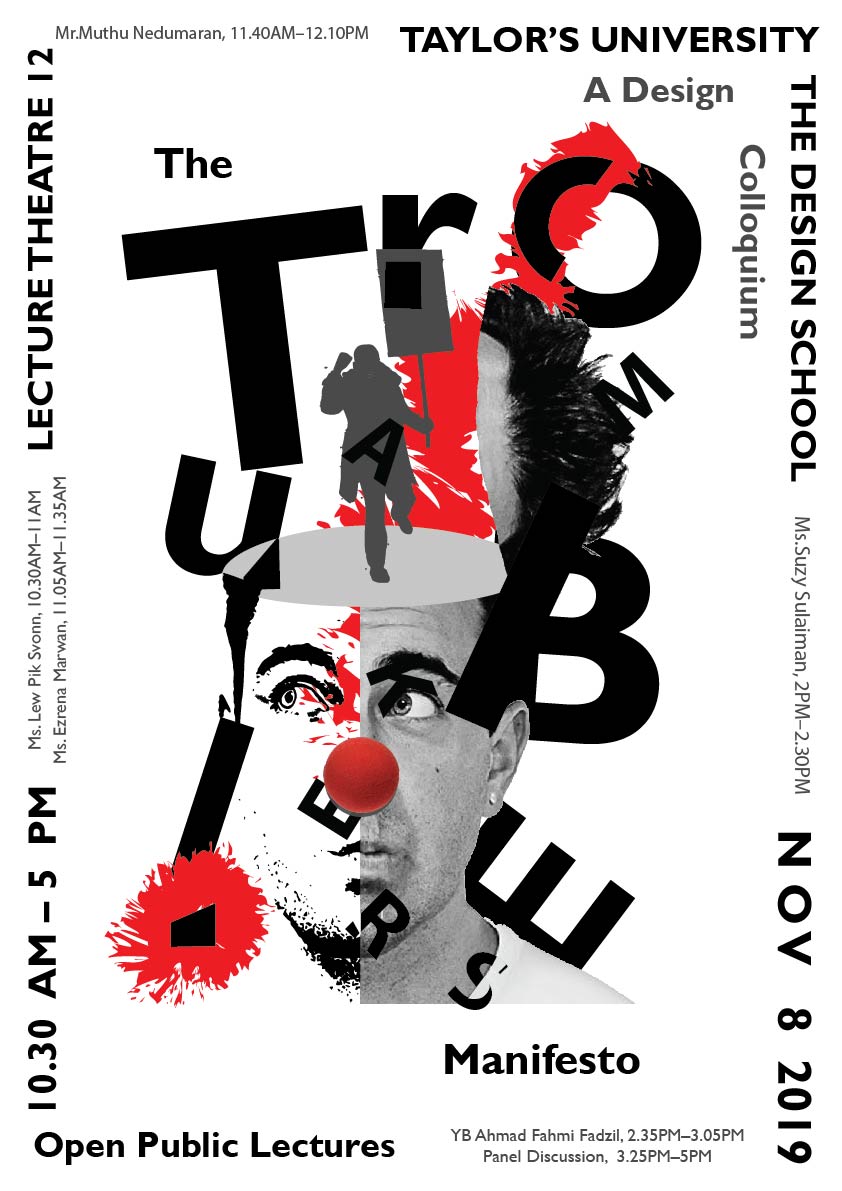
Composition #2
Composition #3
Composition #4
After getting feedback, my lecturer said that the second composition looks interesting but I have to make sure the title “Troublemakers Manifesto” is readable to people who don’t know about this event. I decided to go ahead with the composition and modify further.
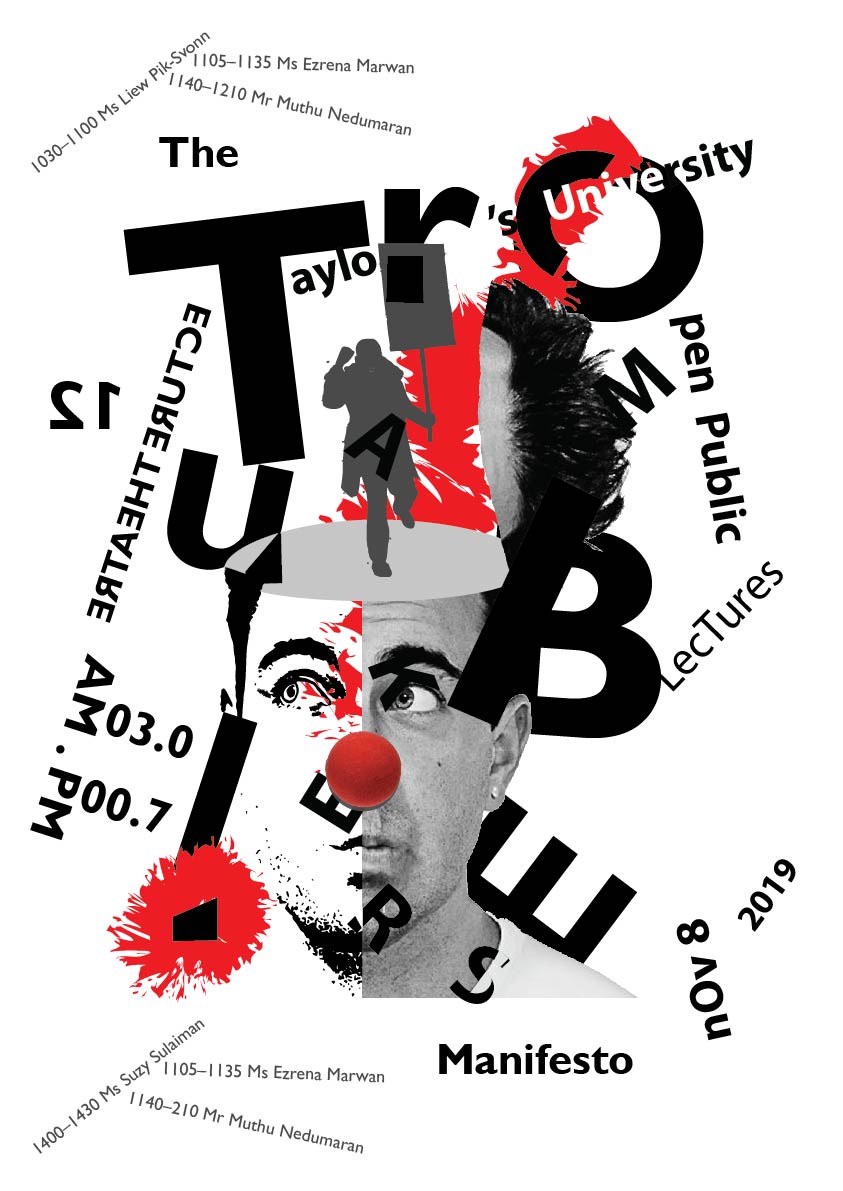
Collateral- Poster (1st attempt)
After the feedback, I had to change the brush style of the exclamation mark stroke I drew at the back to a softer brush as it looks too harsh. After that, I am able to start printing the poster and framing it.
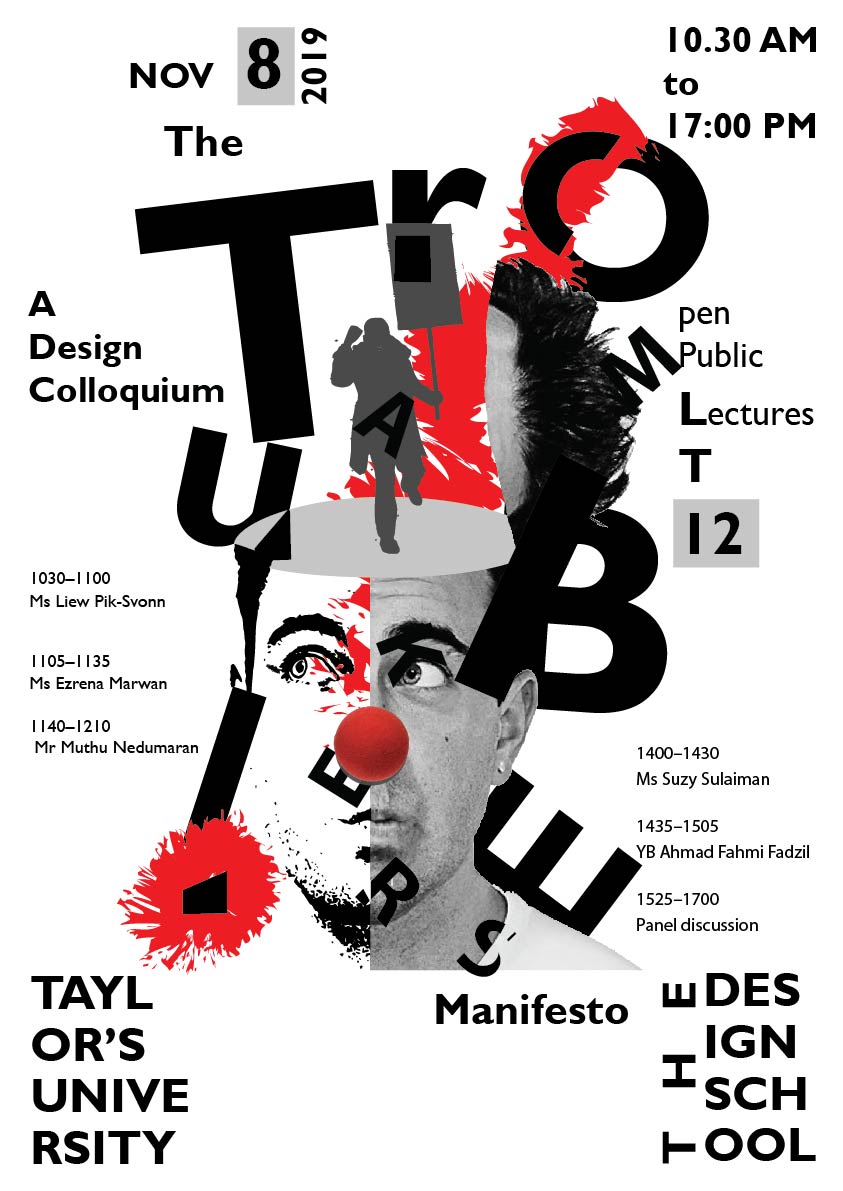
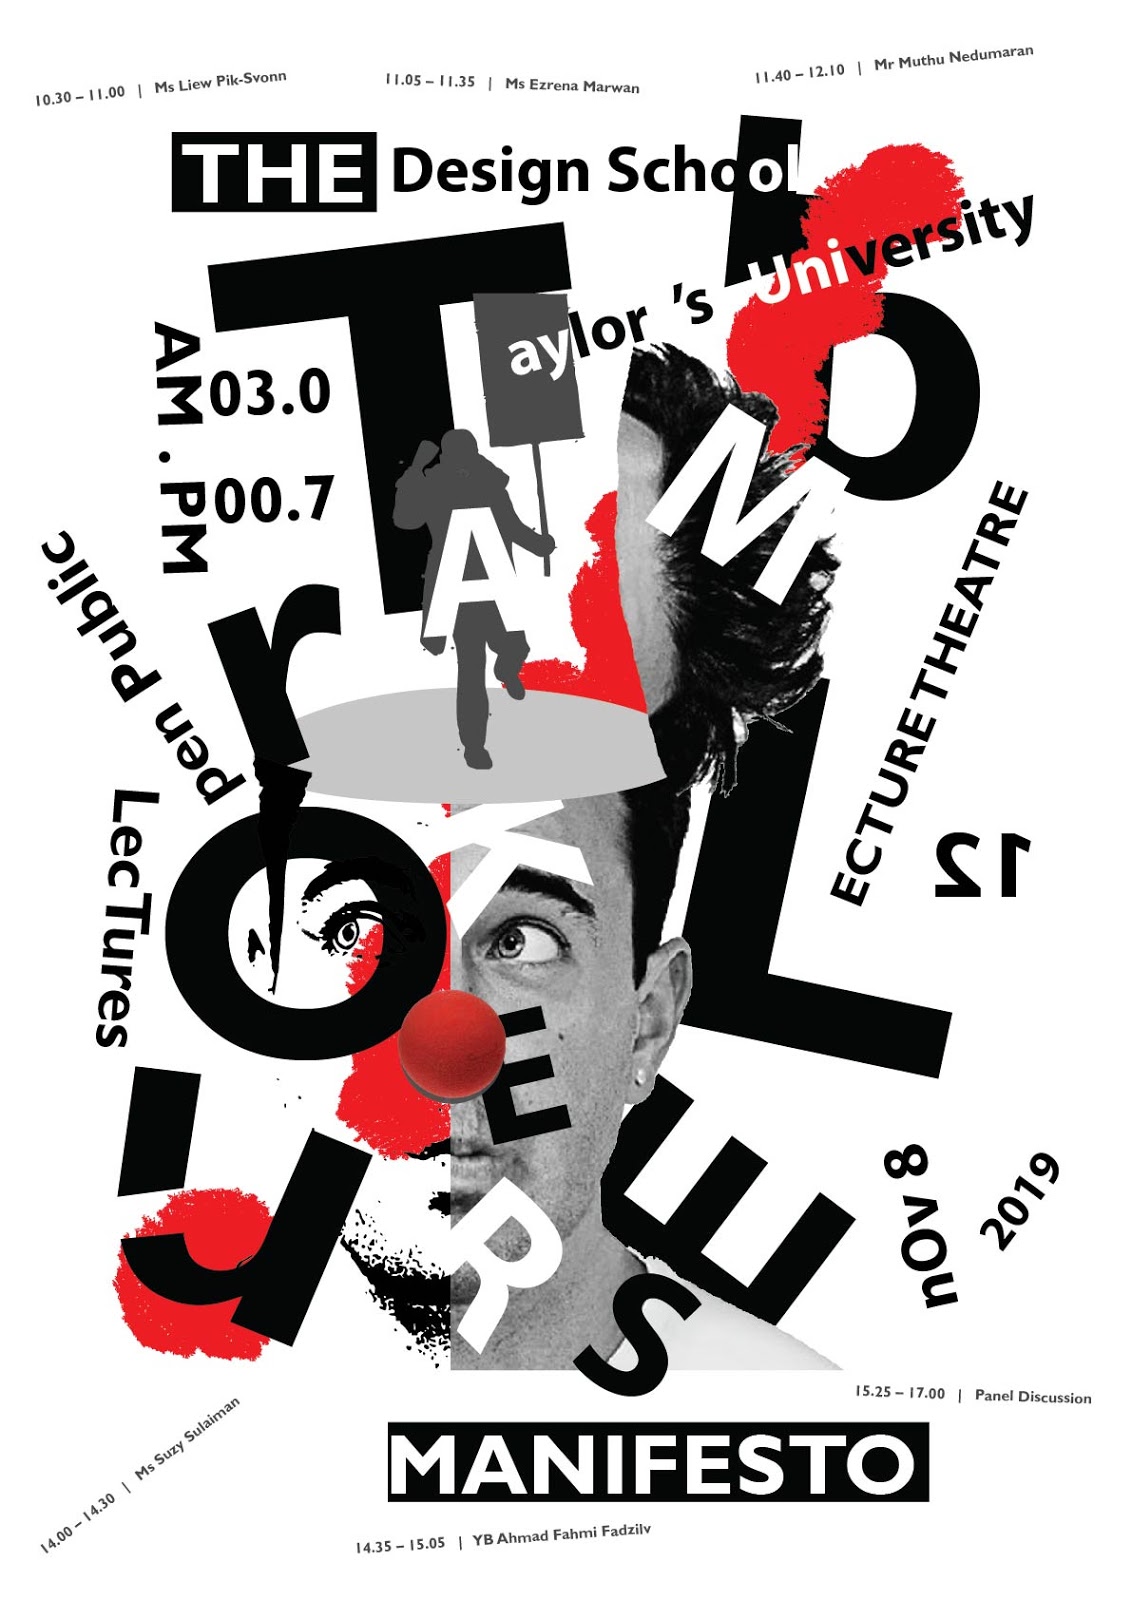
Final Poster- Black & White
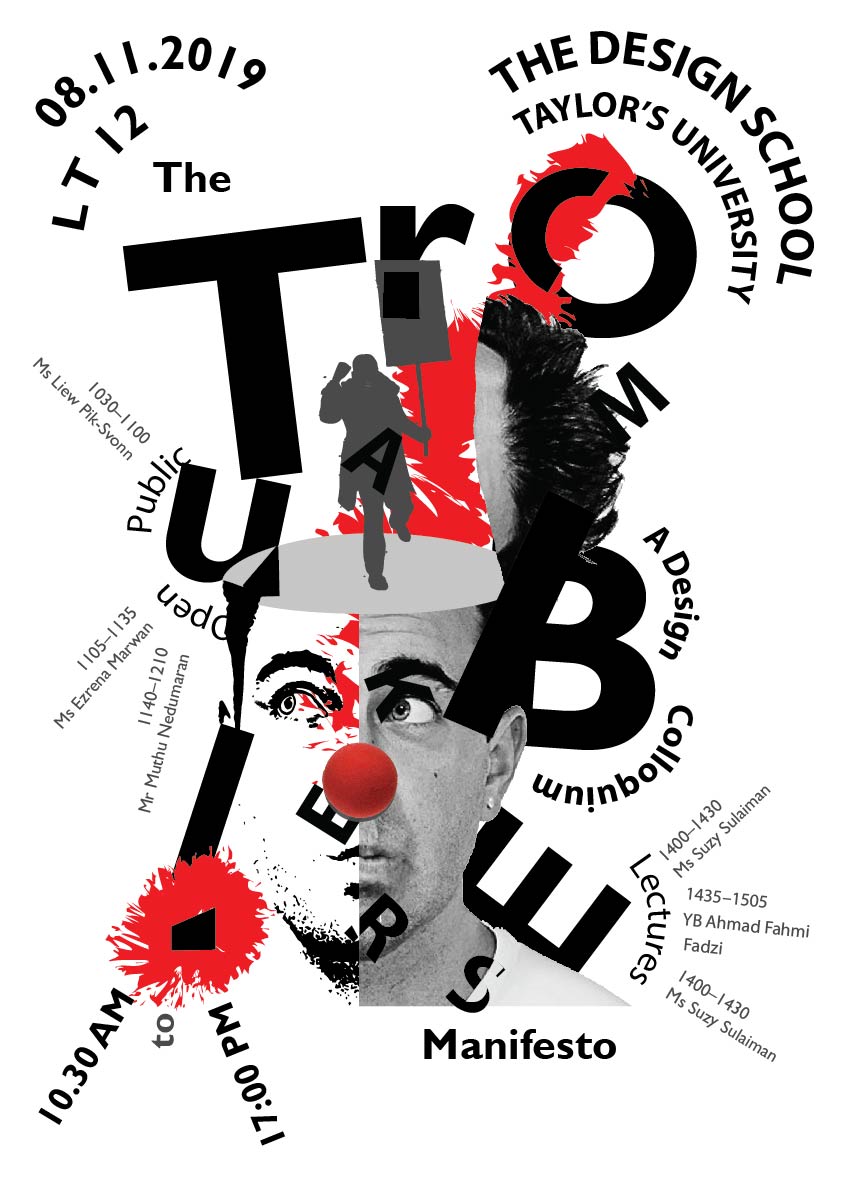
Final Poster- Coloured
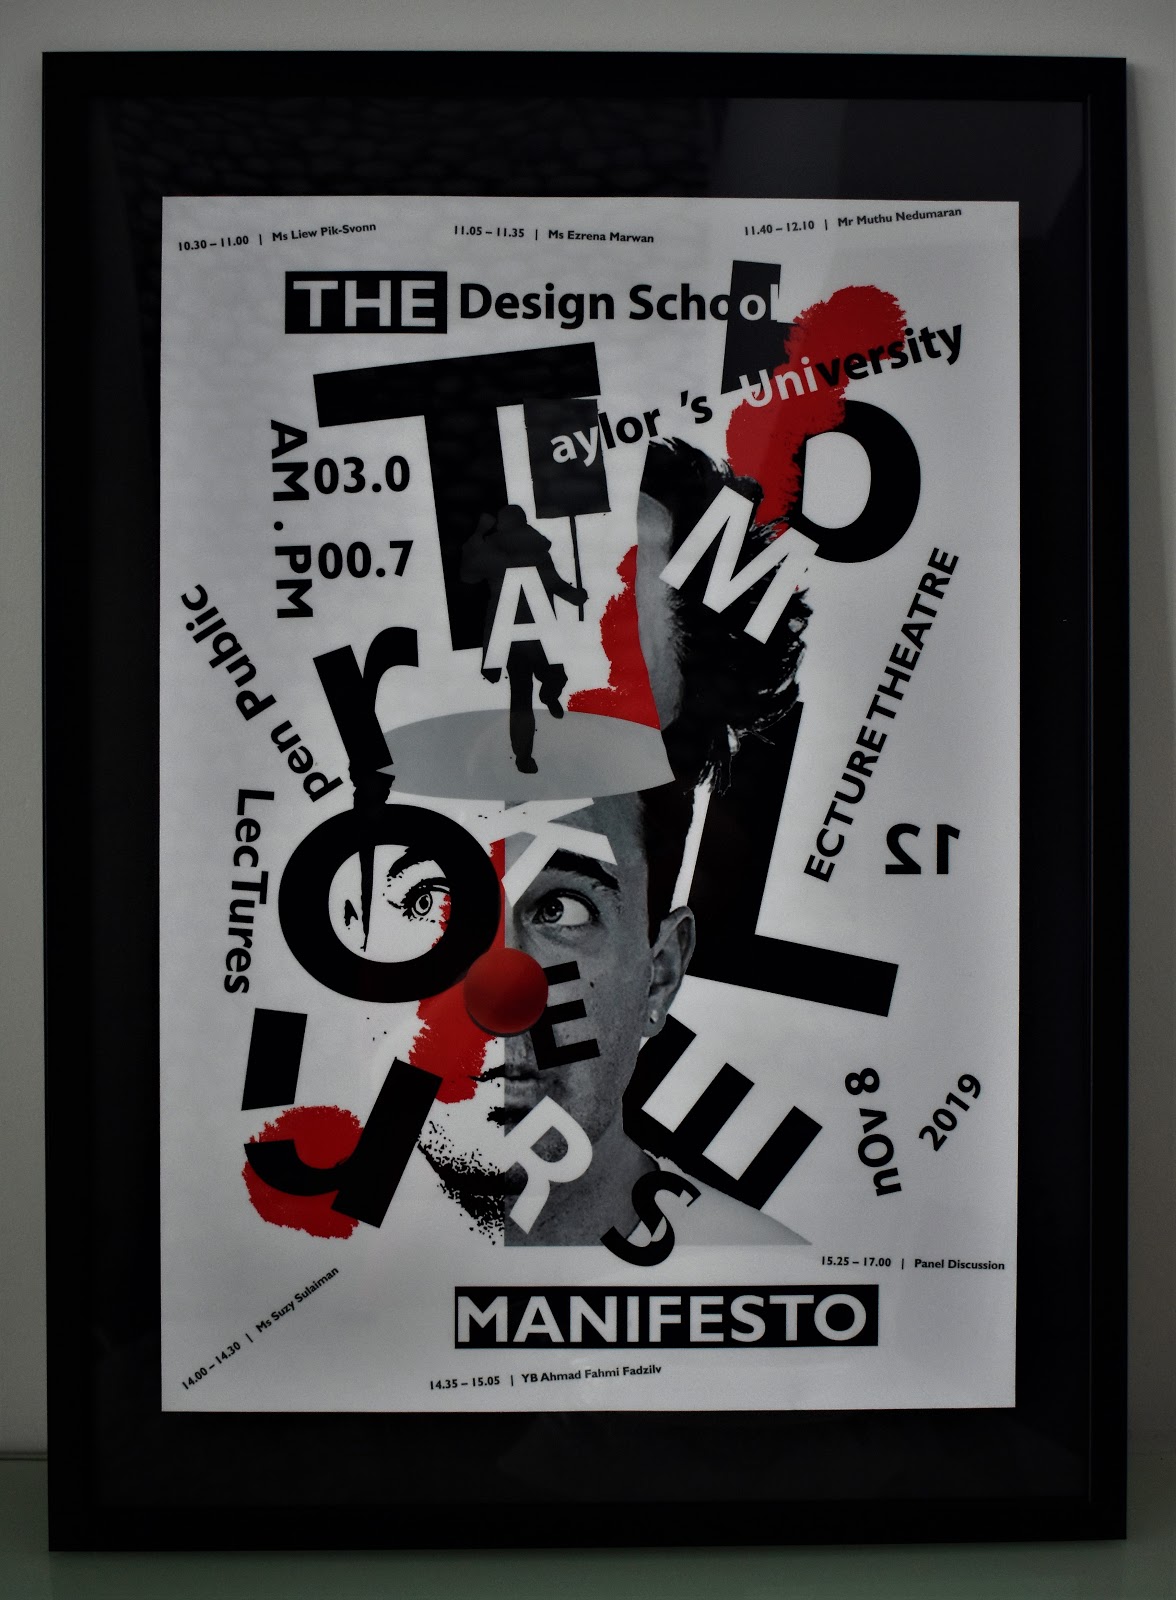
After finalizing the design of the poster, I printed the poster in A2 size and place it in a frame (50 x 70 cm).
Framed Poster (50x70cm)
Besides the poster, I had to make a T-shirt and one more collateral from our own choice. I brainstorm for several collaterals that I can print on.
- Book cover
- Drawstring bag
- Tote bag
- Key chain
- Luggage tag
- Mug
- Bookmark
- Badge
- Phone case
- Non-woven bag
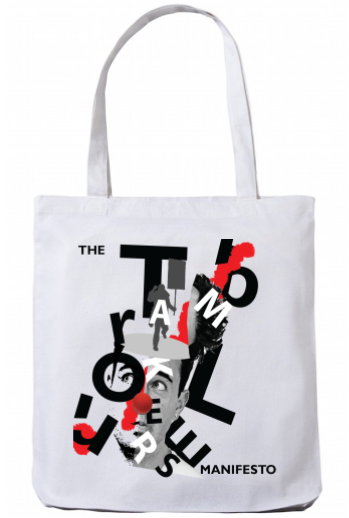
I decided to go ahead and design on a non-woven bag.
COLLATERAL: NON-WOVEN BAG #2
I tried out different compositions using a sample template to see how it looks as a result.
Process of designing artwork on T-shirt in Adobe Illustrator
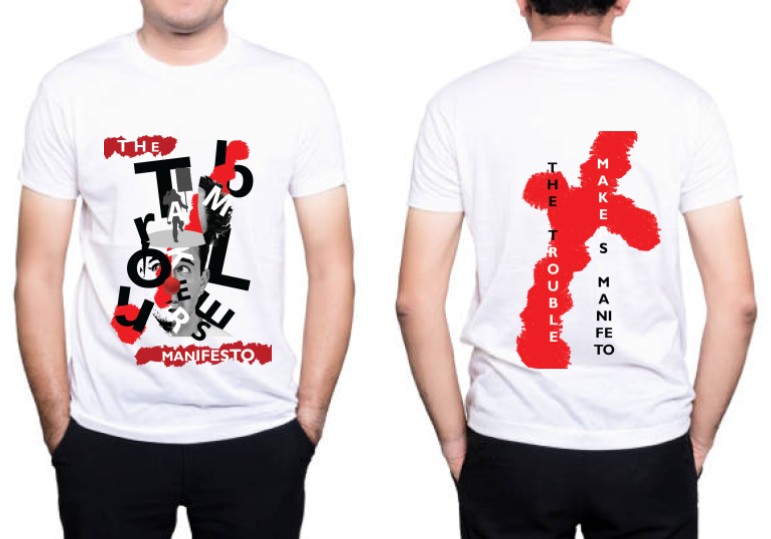
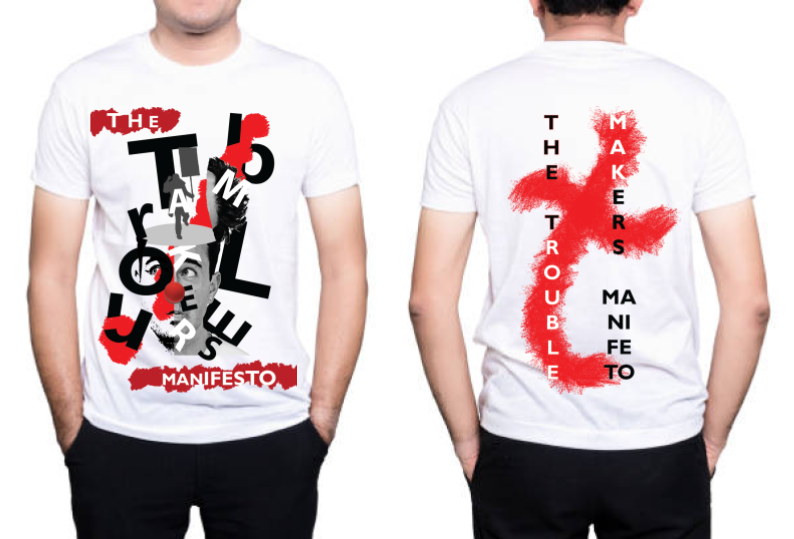
Composition #1- Front & Back

Composition #2- Front & Back
Composition #3- Front & Back
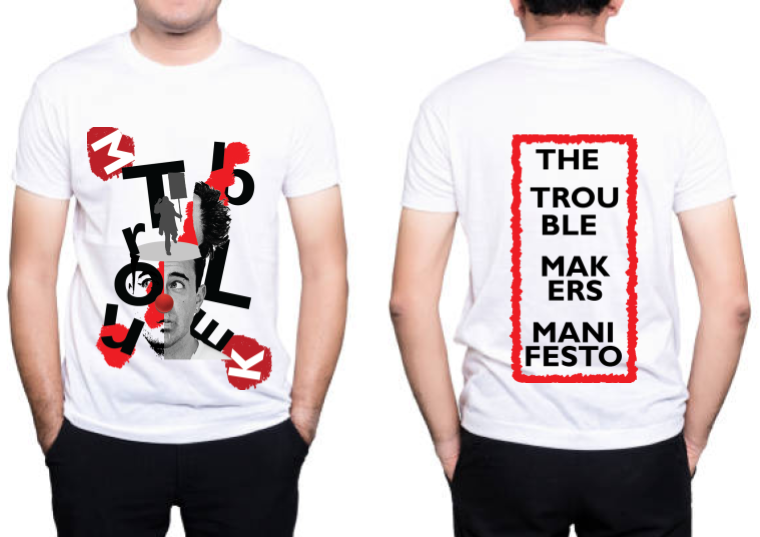
After the feedback, my lecturer suggested going with either the first or third composition. I chose to go ahead with the third idea and modify it a little.
Final Design of Collateral- T-shirt
PDF of Final T-shirt Design (Front & Back):
https://drive.google.com/file/d/1qfis0F9vQqOmYwCh6otc1POylrt_n8OZ/view?usp=sharing
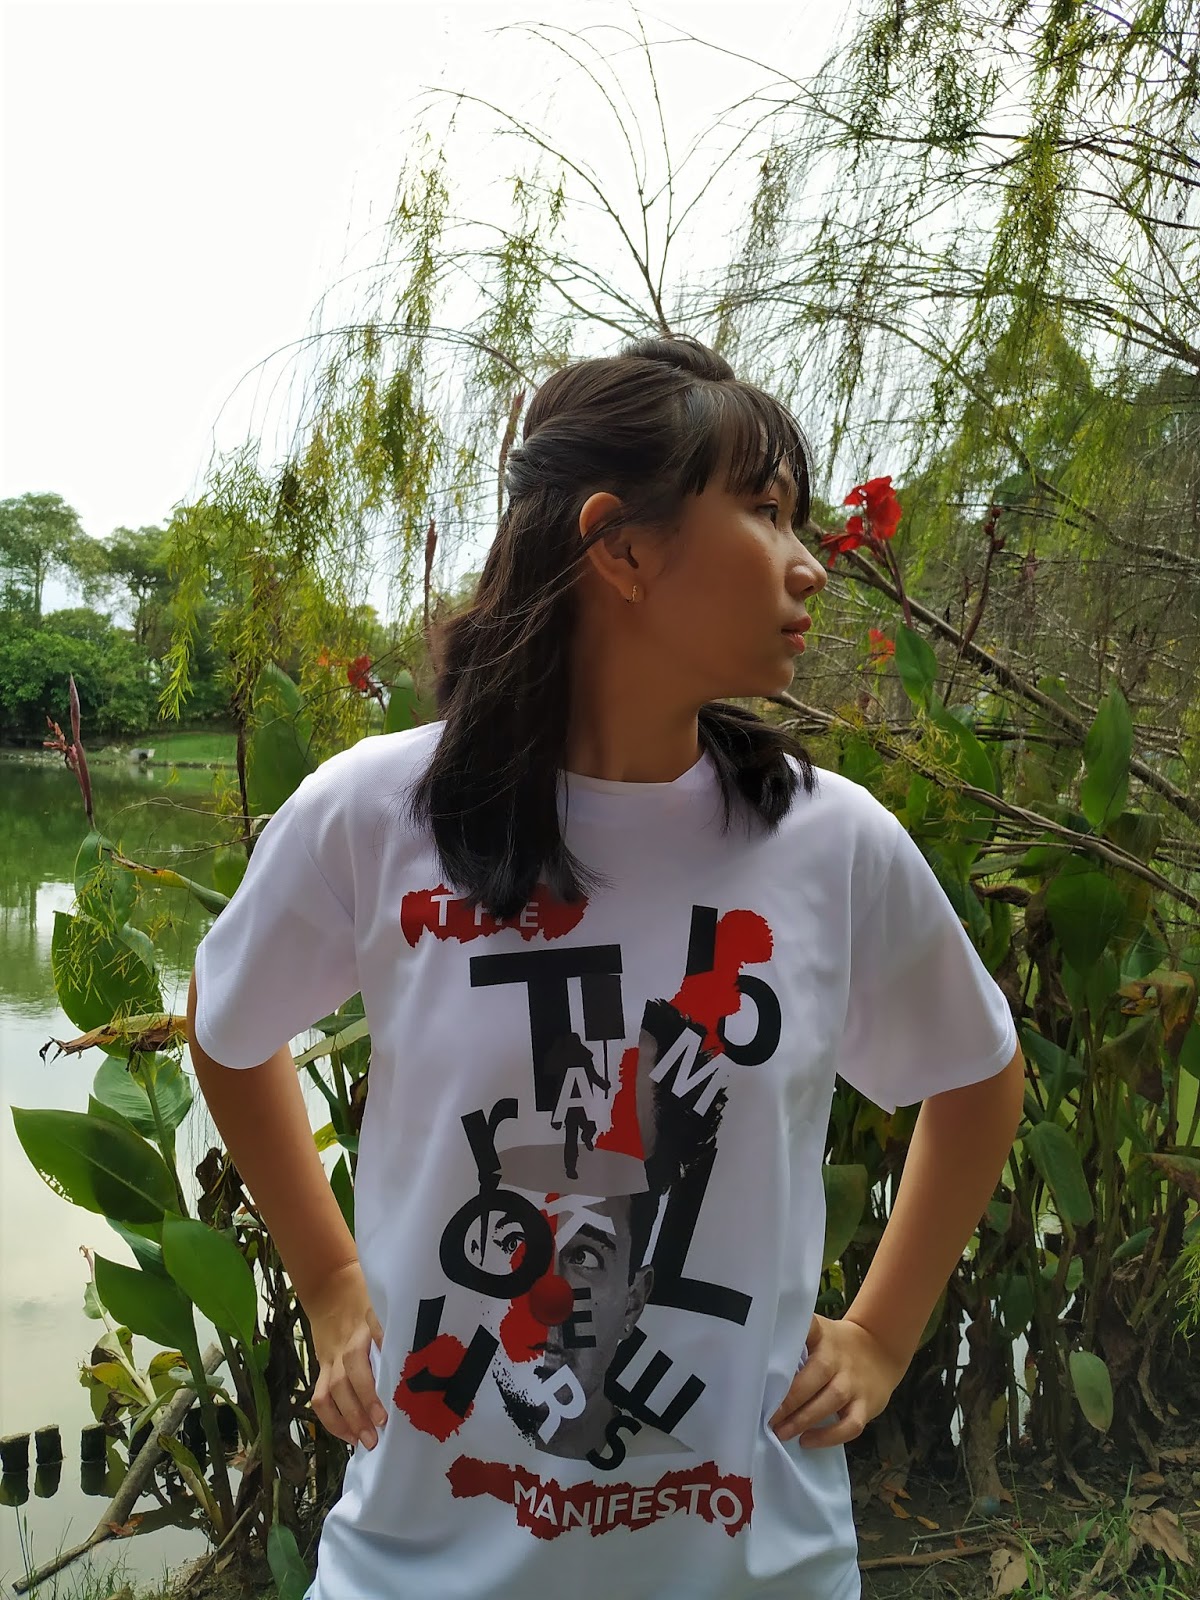
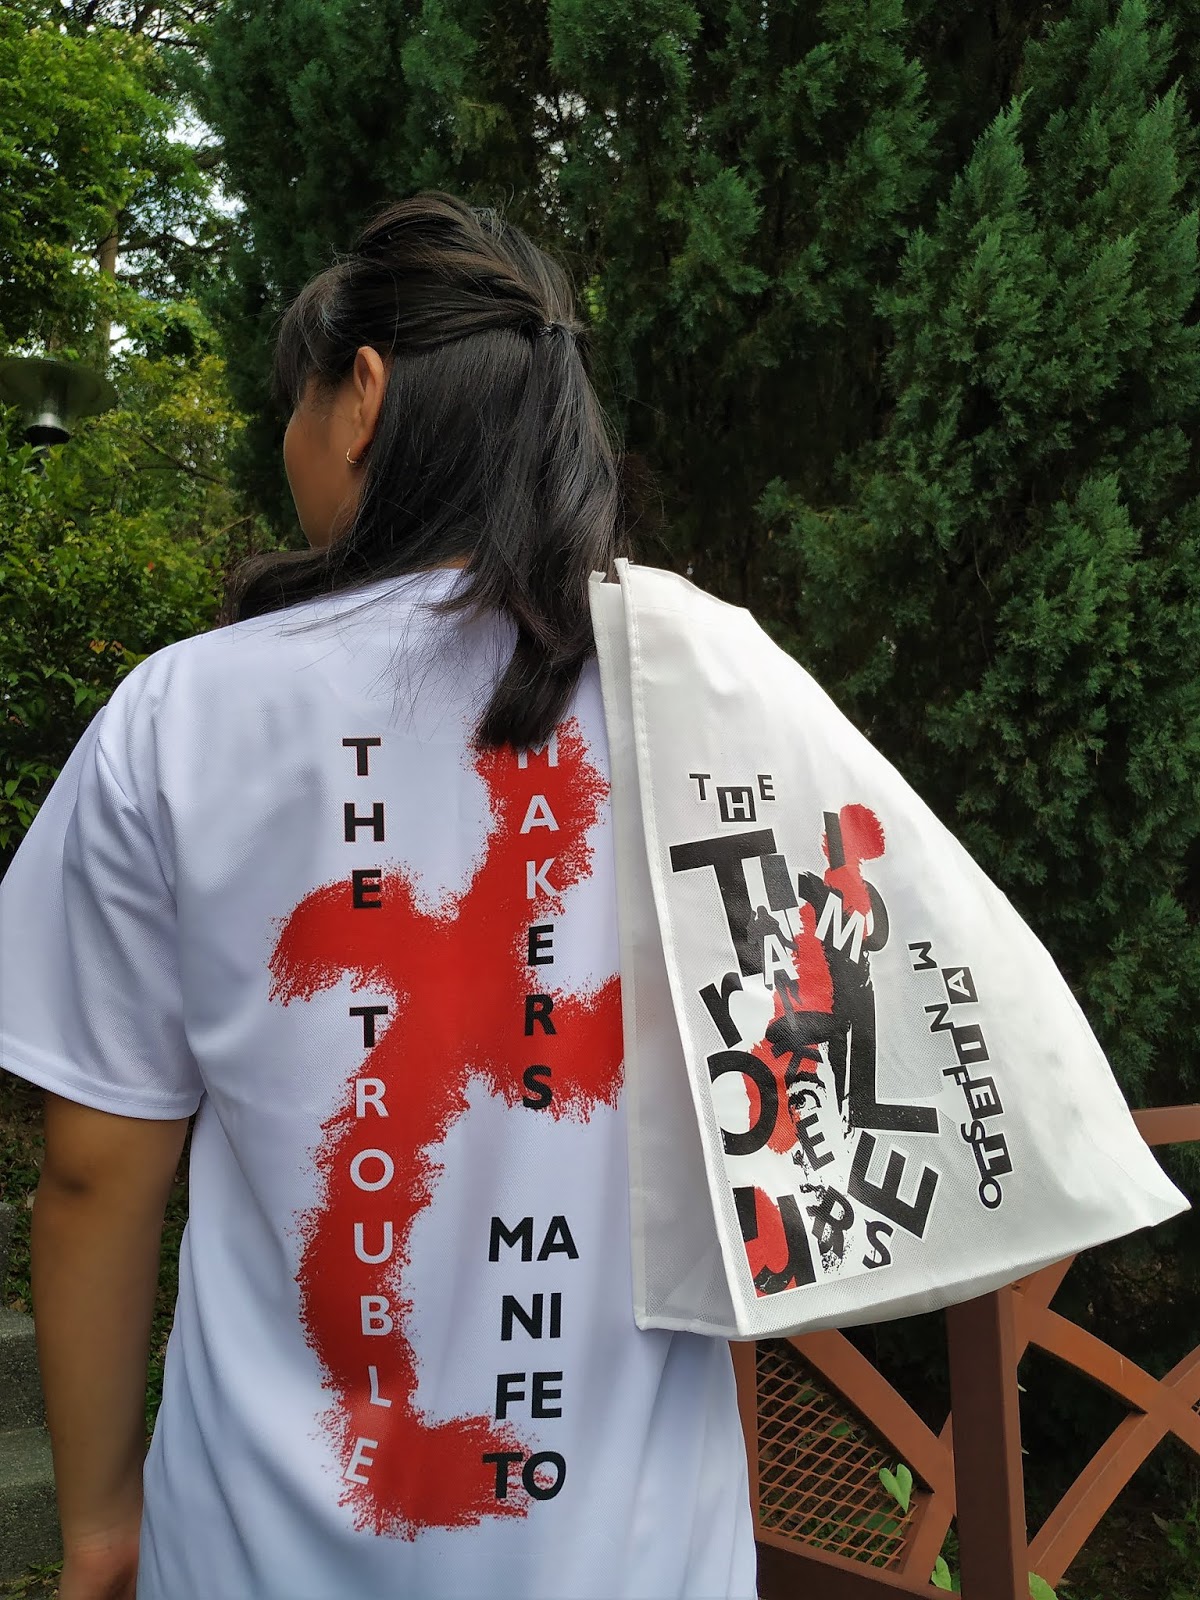
After finalizing my design of my shirt, I printed in on a microfiber material for both front and back. I tested on a user to see how it looks as a result.
Testing on a user: T-Shirt- Front
Testing on a user: T-Shirt- Back
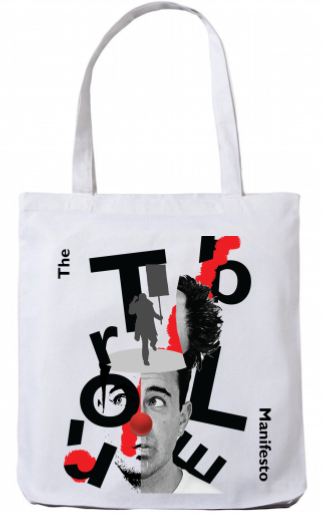
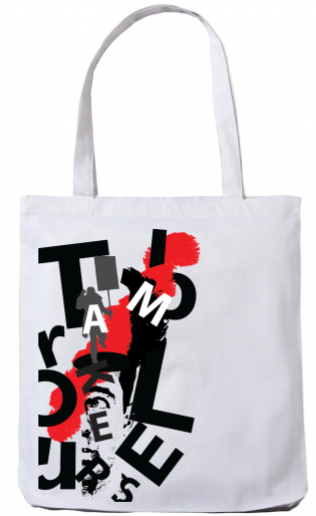
COLLATERAL #3: NON-WOVEN BAG
I tried out different compositions using a picture of a non-woven sample bag that I found online to see the results.
Process of designing artwork on the bag in Adobe Illustrator
Bag Design #1
Bag Design #2
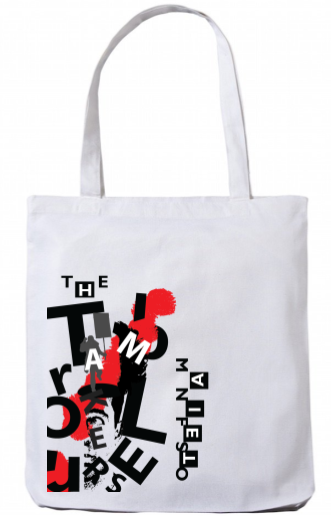
After the feedback given, my lecturer said the design was not good enough and develop it further. So I decided to incorporate my first design of my shirt and changed it a little to make another design for the bag.
Bag Design #3
I noticed that the printing for the bag does not have a back printing so I added the words “The” and “Manifesto”.
Final Design of Collateral- Non-Woven Bag
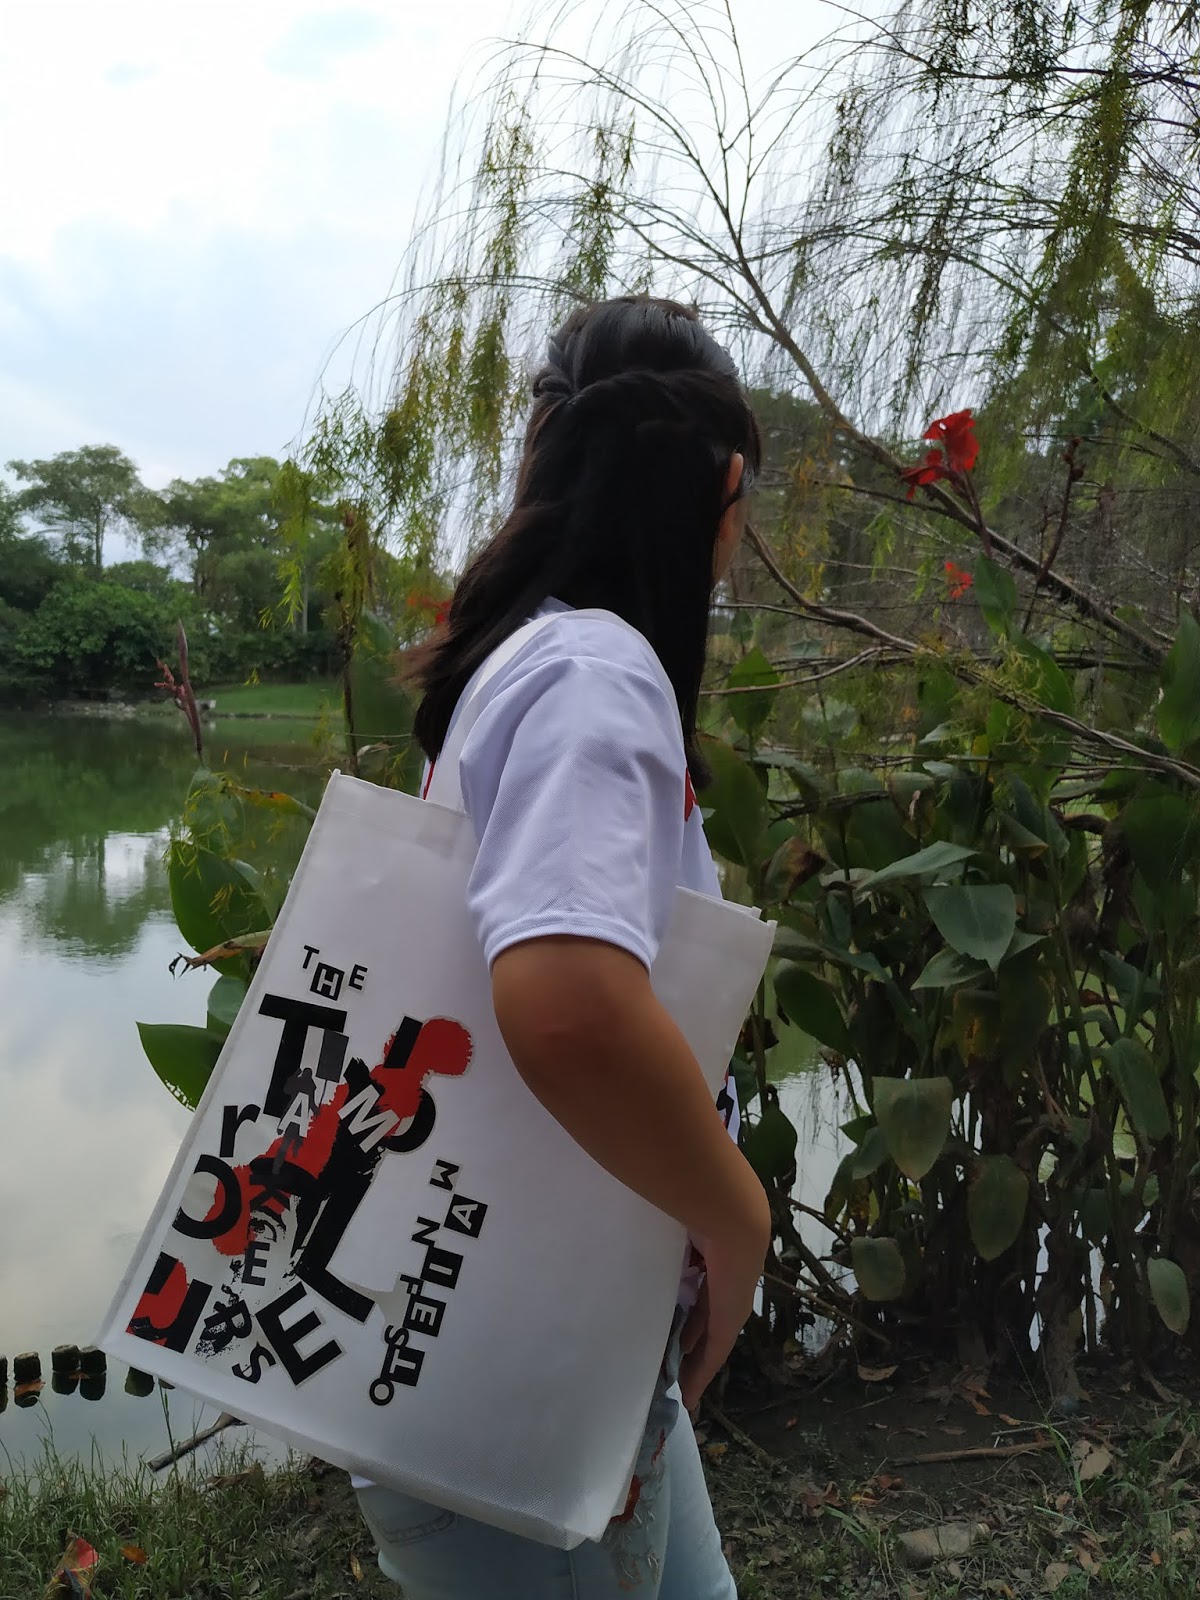
After finalizing the design and printed it on an actual bag, I tested it on a user to see the results of the appearance.
Testing on a user: Non-woven bag (Front)
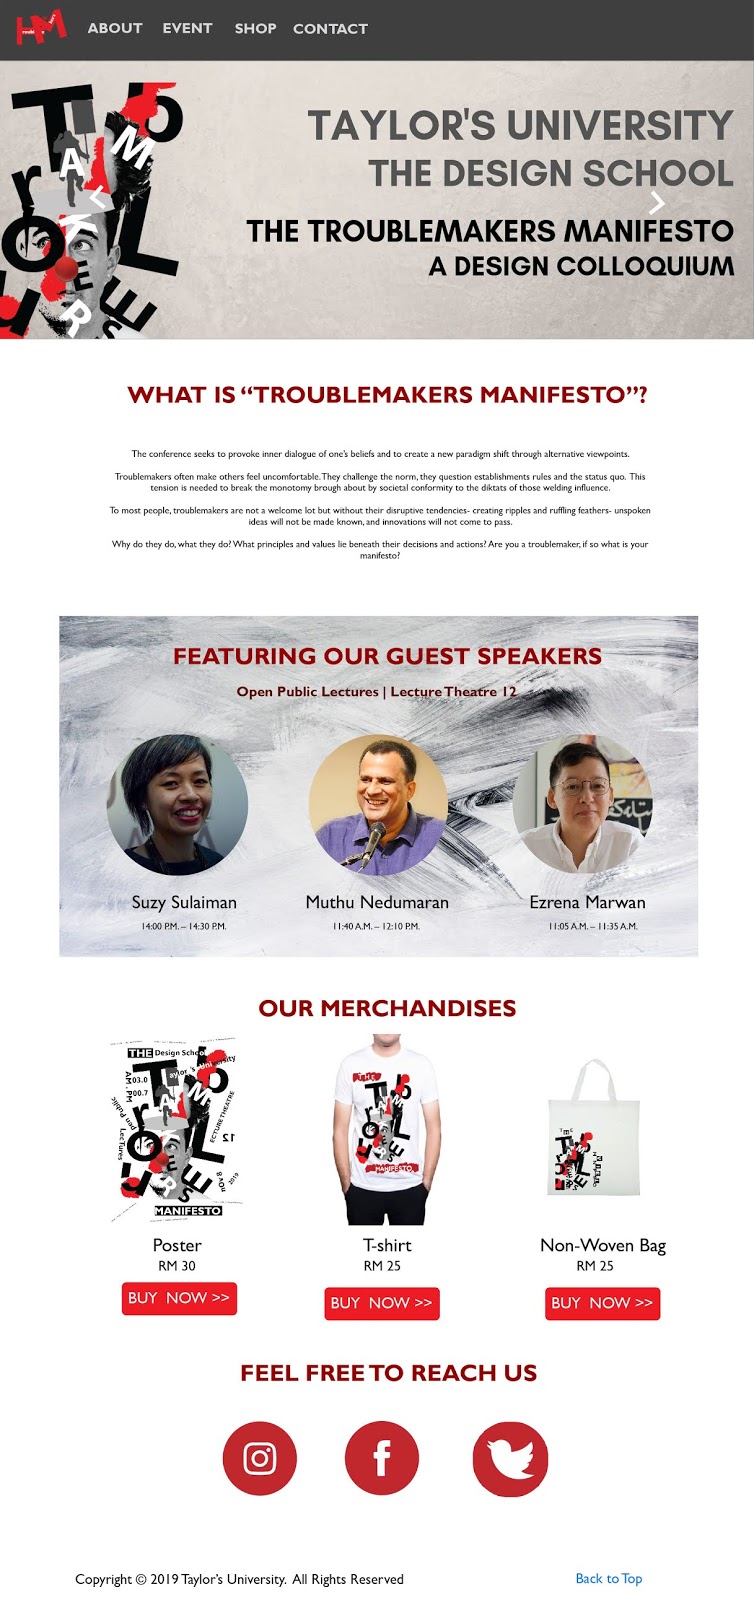
COLLATERAL #4: MICROSITE
For our project 2 in Interactive Design, we made a microsite relating to our topic, The Troublemakers Manifesto from Advanced Typography project 1 and 2.
Final Microsite
Here are the four collateral together with the key artwork.
Flat Lay- Left: Key Artwork, Poster, Middle: T-Shirt, Non-Woven Bag and Right: Microsite